

After reading an article about making a bullet trail in 3DS MAX, i tried making one in Cinema 4D, and I think it turned out OK. Here is an example of the finished result.
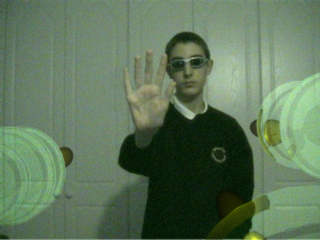
Don't I look like a moron in those glasses?
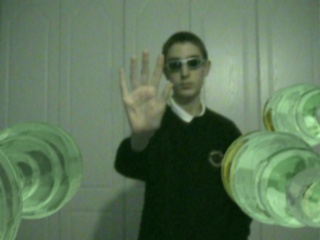
Anyway, that's the result using the texture I made, but that dosen't mean you cant fiddle around with it to get the effect you want.
Also this was rendered on Cinema 4D v5, so its pretty outdated, I'm sure you can get a better result than this.
OK first thing.
-Open up Cinema 4D (duh) and make a sphere.
-Resize the sphere on the X axis so you get something that looks like a magnifying glass lens.
-Duplicate this untill you get 8 of them the same.
-OK, time to resize them into ripples.
Keep the two middle ones the same.
Resize the ones on either side by the Y and Z axis so its a little smaller then the middle ones.
-Repeat this with the other ones so the last is around a third to a quarter of the origional.
You should have something similar to this:
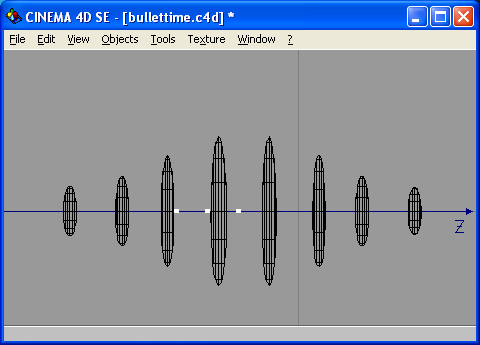
-Now, group them up (easier to work with).
-Time to make the texture! Make a new texture, and uncheck colour. Then, check Transparency and Reflection.
-In the transparency tab, make sure its totally transparent. Add a refraction of 1.5 to 4, depending on your scene.
-Go to the reflection tab, and set it to 25%.
-Add this texture to your group of ripples with whatever mapping you like (I used spherical).
-Before you can see it work, make a sky and add a texture to it. Give the texture a slight green tint if not already, to give it a Matrix look.
-Now go to File, Preferences, Render. Put transparancy to "With Refraction", and out Reflect onto All Objects.
-Go back to the mian window and render! (Press Ctrl+R for a quicker way).
-The bullets were resized spheres with a gold texture with a metal highlight, and a reflection.
For the final render I added a motion blur of 9 (that hardly did anything), and antialiasing of 1.0 Always. To make the CG blend in with the backround, I added a noise filter to the render with Paint Shop Pro.
Hope this tutorial was useful to some of you, and sorry for the numerous typos
-Riggzy-


